Process

Leading
and
Coppering
In the copper foil technique each edge of every piece of glass is wrapped in foil. Each piece is then placed onto a flat surface tightly adjacent to its neighbor. Flux is then applied and a lead-tin combined solder is placed over the joints. This gives the solder its distinctive silver color. If desired, a copper colored or black colored patina can be placed over the cooled solder to give it a different type of look depending on what the artist wants to convey.
Lead came support for stained glass work was first described in about 1000 AD. It has either a U-shaped channel for the end pieces or an H shaped channel to support glass pieces in the middle. Solder is used here to connect the end of the lead came to the side or end of another piece of came. The ‘Boat at Sea’ work (above) is a combined lead came and copper foil project created for a home in Cannon Beach, Oregon.

Mosaics
With glass mosaic work, it’s necessary to start with a sheet of window glass or an old window with surrounding frame from perhaps an old building. The design you choose can be a drawing, a photograph or a painting whose image can be sketched or transferred onto poster board. The glass colors are then picked as you desire for your project. The individual poster board pieces are then cut and used as the templates to cut and grind the glass pieces and their edges. The glass elements are then placed like a jigsaw puzzle on the larger clear glass base and glued to it with a clear glue such as Lexel. Finally, a sandless grout is used to fill in the spaces between the glass pieces.


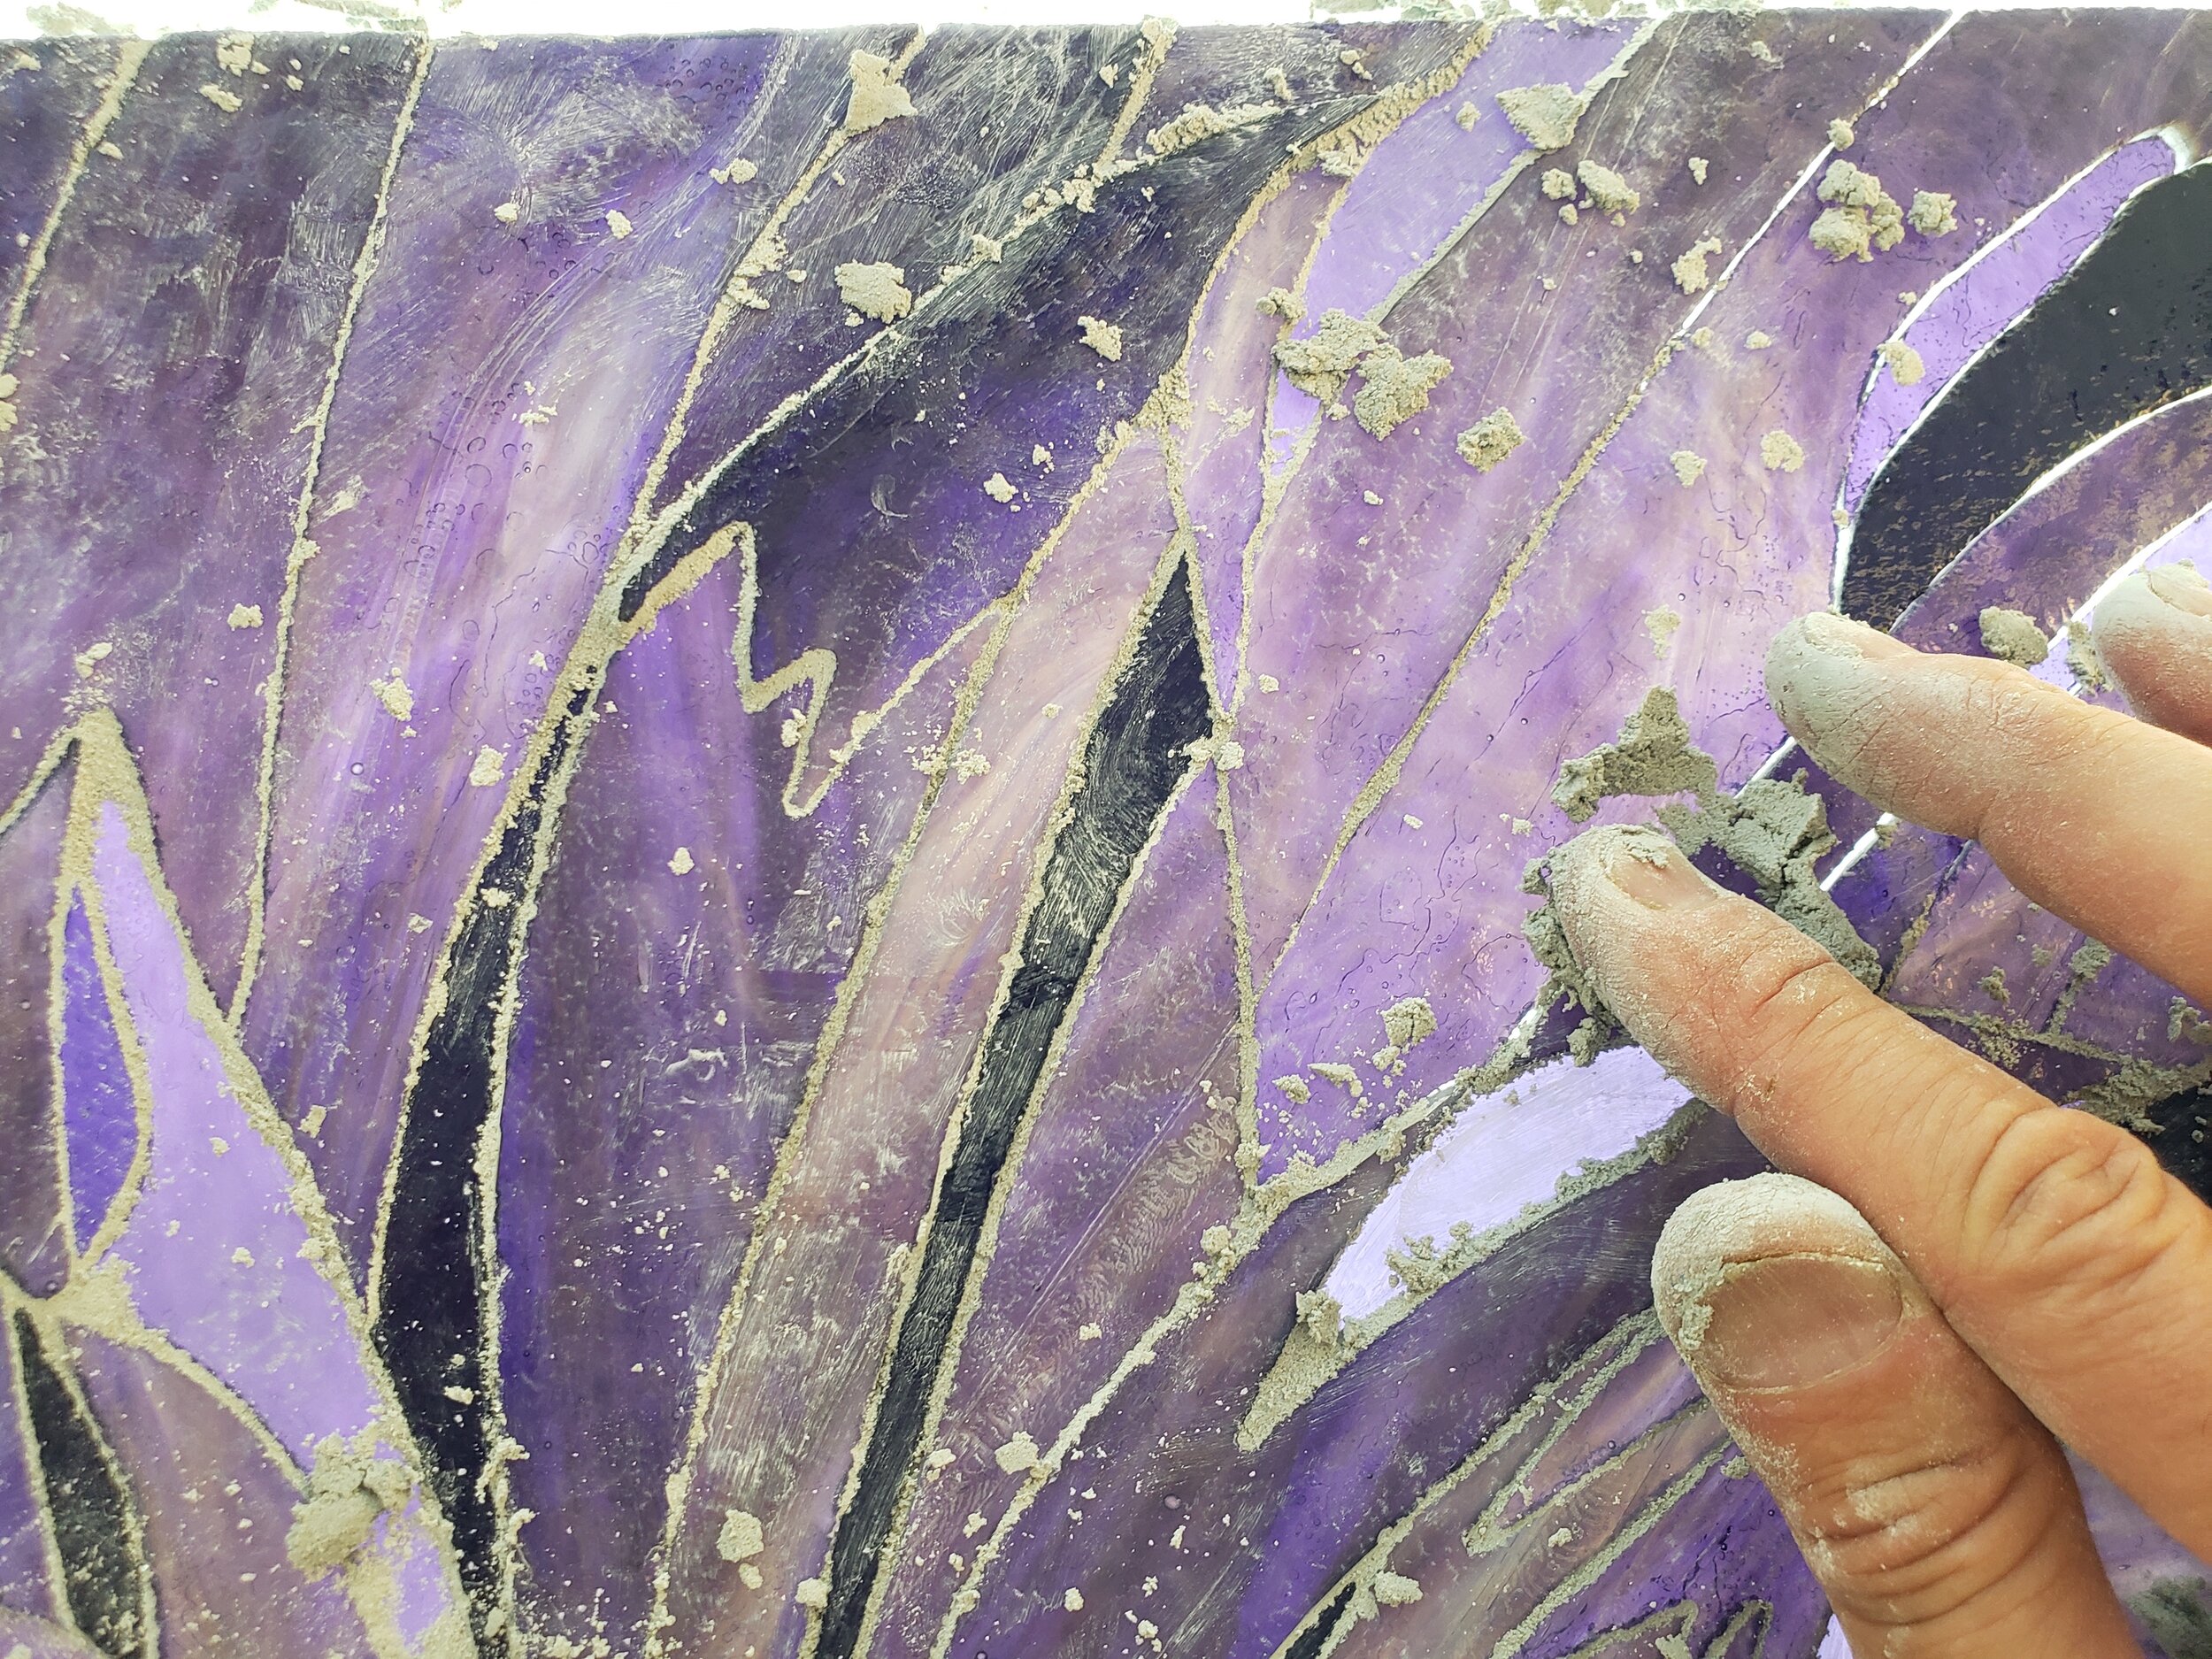

Creation of the dahlia.
The process above started with a photographic image of a red/yellow dahlia. The image was flipped over and rotated 90 degrees. It was then sketched onto posterboard. Each small section of posterboard is then cut out, placed over the color of glass that you want to use, cut with a hand held glass cutter and/or diamond saw, and then its edges ground to the exact size of the posterboard template. It is then placed into the “jigsaw puzzle” with the rest of the cut pieces. As one proceeds, Lexol glue is used to fix the cut piece of glass to the large piece of clear glass that is used as the backing. Grout is then rubbed into all the spaces between the small pieces of glass. After cleaning, a frame is then constructed with corner brackets and the project is then finished and ready to hang.

Masks
I could not find anything on the internet with regards to the creation of a 3-D stained glass mask. Well, as necessity becomes the mother of invention, I proceeded with trial and error and created a design, acquired a mannequin head, made a template, and away I went. Each geometric piece of glass has to be cut multiple times in order to lay evenly over the underlying facial contour. Each is then wrapped in copper foil and then soldered to its neighbor with the facial curve occurring at the solder joints. The larger, more complex masks can take up to 50-60 hours of work each.